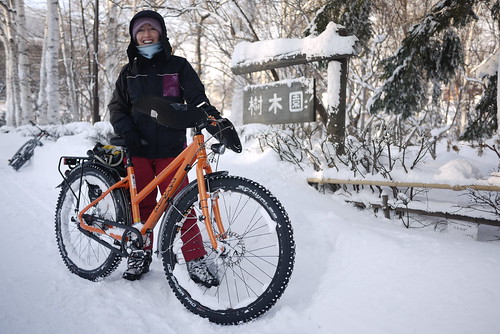
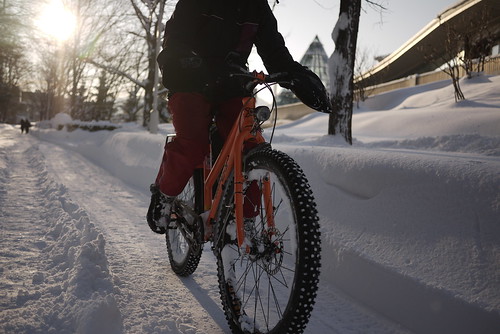
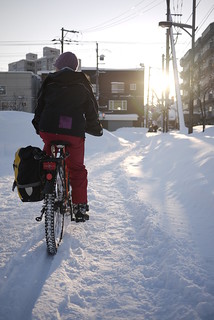
As many readers will know, I live in Sapporo, Japan, with my wife Haidee. You’ll probably also be aware that I’m a fan of human powered transport. Haidee is also, and we cycle most places around town here. In winter, this becomes quite the challenge.
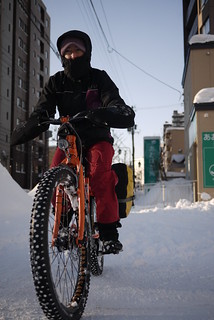
While I am riding a Surly Karate Monkey mountain bike with massive wide tires, which make short work of ruts and mush and ice…
Haidee has had to make do with her Trek FX7.5 WSD hybrid bike, whose skinny tires are really quite the challenge.
The Trek is an awesome summer bike; it is light weight, quick, and does a great job at cycle touring. But despite Haidee’s efforts at making it work as a winter bike, it has proven to be a lot of hard work for her, and for me (having to stop and wait often for her to push the bike over icy obstacles and through deeper patches of snow). What I wanted, was her to be on a bike that would make cycling in the snow fun for her and for me cycling with her. And this required wide tires, something that the Trek just wouldn’t take.
So yes, out of my selfish desire, I set about building her a new bike which would handle the Sapporo winter better. The reason I wanted to build the bike myself was because I wanted the bike to have nice fat 47mm wide rims, in order to make wide tires as stable as possible at low pressures (better stability in soft snow). A touring/MTB-oriented bike with stock rims of that width are not common at all.
The frame requirements were as follows:
- A frame with tire clearance up to 60mm wide (2.35 inches).
- A frame with gobs of standover clearance; less than 70cm high (Haidee is 154cm tall). That is, a stepthrough or mixte frame.
- An extra-small frame with an effective top-tube length of around 53cm.
There are plenty of complete bikes on the market which fit this criteria (see https://www.balloonbikes.com/en/bikes-en.html). However, companies which offer just framesets like this are as scarce as hen’s teeth. The only companies I could find offering low standover extra-small wide tire clearance framesets were Storck Bicycles (Germany) with their Multitask Comfort, and Maxx Bikes (also Germany) with their Pacemaxx Comfort. There were others, including some amazing looking mixte/stepthrough carbon frames from China (like the ones here), but none that had the extra small frame sizes I needed.
In the end, we bought the Pacemaxx Comfort, simply due to the ease with which I could order the frame and parts. Using Maxx Bikes’ ‘configurator’, you can choose color and essential parts you want; I ordered the frame with bottom bracket and headset installed. The real clincher was that because I was going to be in the Czech Republic for a conference, I was able to have the frame sent to Prague (from Germany) for 12 Euro rather than the 250 Euro it would have cost to have it sent to Japan. Taking the boxed up frame back to Japan on the plane (Lufthansa and ANA) was no extra charge. The time from order to shipping, including a custom powder coating job, was something like 3 or 4 days (with numerous on-the-ball emails with Maxx Bike representative Uwe Matthies).
Once home in Japan, the building began. The parts list runs something like this:
- Frame: Maxx Bikes Pacemaxx Comfort frame (x-small), with vertical dropouts and eccentric bottom bracket
- Fork: Kinesis Aluminium fork
- Crankset: Truativ Stylo 38t chainring
- Rear hub: Shimano Alfine 8-speed internal gear hub (22t cog)
- Front hub: Shimano Alfine dynamo hub
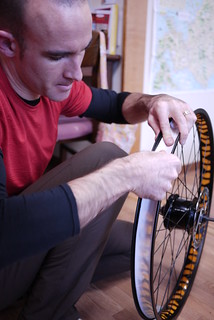
- Rims: Northpaw-S 47mm wide 26-inch
- Wheelbuilding: Done by Sam’s Bike in Sapporo – the legendary wheelbuilder
- Headset: Cane Creek Tange ZS 22 semi-integrated
- Brakes: Avid BB7 (mountain at the front, road at the back), with 180mm rotors
- Brake levers: Avid Speed Dial 7
- Brake cables: Yokozuna compressionless
- Handlebars: Satori Noirette (swept-back bars)
- Stem: Dixna Ridgeline 80mm, 6 deg
- Tires: Schwalbe Ice Spiker Pro 26/2.35
- Grips: Ergon GP1
- Chain-case: Hebie Chainglider
- Pedals: 45NRTH Helva pedals
- Headlight: B+M Lumotec IQ Cyo R Senso Plus
- Mudguards/fenders: SKS 65mm wide
- Kickstand: Hebie Type 663
The 38-tooth chainring paired with a 22-tooth cog on the Alfine 8-speed gives 24-74 gear-inches, according to Sheldon Brown (for 26 X 2.35 / 60-559 / MTB tire with 170 mm cranks). This is just about right for Haidee, who is not much of a speed-demon…
| Low | – | – | – | – | – | – | High | ||||||||
|---|---|---|---|---|---|---|---|---|---|---|---|---|---|---|---|
|
|
|
|
|
|
|
|
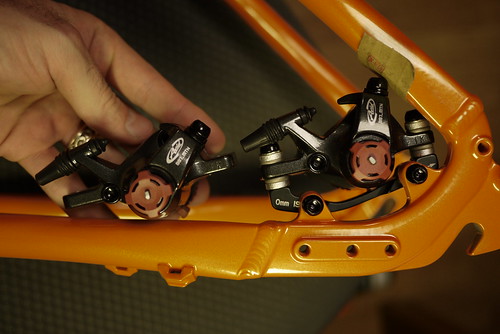
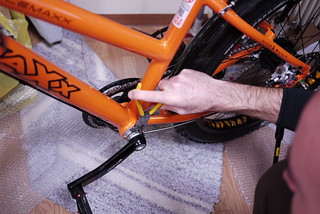
The build was fairly straight forward, with the main peculiarity of the frame being that Avid BB7 brakes set at a 140mm rotor position wouldn’t fit in the rear triangle; the lever-arm would ‘foul’ the seat-stay.
Astute readers will notice that the adapter is back-to-front, but turning the adapter around just makes things worse. On the left is where the lever-arm is supposed to rest, and on the right is the extent to which the calipers don’t fit. Avid BB7 calipers come in two different versions, however: the Mountain (above) and Road. The Road version has a shorter pull, so the lever-arm is always in a position similar to the above ‘fouled’ MTN version. So I ordered a BB7 Road caliper for the back. This helped to some extent, but the lever-arm still fouled the seat-stay. In the end, I tried both the 140mm rotor adapter and the 160mm adapter, but ended up having to go up to 180mm, which pushes the whole caliper back and down. Problem solved. Gobs of room for the lever-arm, and gobs of stopping power on tap (which, admittedly, for Haidee’s svelte frame, is entirely overkill).
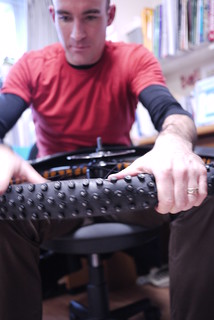
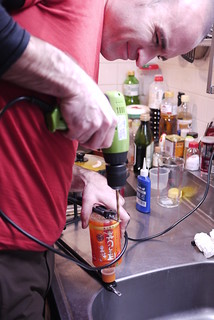
Another challenge, unrelated to the frame, was fitting the Schwalbe Ice Spiker Pro tires (kevlar bead) onto the Northpaw-S rims. Getting the bead seated was a mission. It is a very tight fit; getting the tire onto the rim is no problem (it can be done by hand), but getting the bead to pop into the clinch all the way around the tire required some tire lubricant (I used Schwalbe Easy Fit) and pumping the tires up to the max pressure (the tires popped in for me at 45PSI), and leaving them overnight at that pressure. They have now been at around 10-15PSI for a couple of days on the bike, and the bead is staying put (thanks to Greg Smith of Schlick Cycles for the advice).
Overall, the bike-build went really well, the minor frustration with the brakes notwithstanding. The real joy is seeing the difference it has made to Haidee’s confidence on the snow and ice and ruts and bumps of the Sapporo winter cityscape. On my own bike, I found the difference going from 27mm wide rims to 47mm wide rims (both with 2.25inch wide tires) like night and way in terms of stability, and it seems like Haidee is finding the same. Smiles all around.
It deserves to be said that the Pacemaxx Comfort frame really is a great frame; there are braze-ons for all manner of drivetrain setups (including cable-routing lugs for Rohloff hub cables), and even small details such as the rack mounting bolt hole being a hefty 6mm diameter rather than the usual 5mm (requiring some modification of Haidee’s Bontrager rack), really speaks to its design as a MTB-touring frame. Direct mounting for the kickstand, and the eccentric bottom bracket – just fantastic.




2 thoughts on “Maxx Bikes Pacemaxx Comfort Bike Frame – a mountain bike frame for small women”
Recently, I stumbled upon your 2008 Chinese skating adventure on the web. I began reading and could not stop. Being a skater, myself, I use my downhill for commutes, travel, and sheer enjoyment. If skateboarding has a superhero, it’s Tony Hawk. But if skateboarding endurance has a superhero, it’s you. Thank you for allowing me to accompany you on your adventure and heroic inspirational journey. I live in New Jersey where those are few and far between. You have touched another life with pure soul. Kevin.
Hey thanks for the kind words Kevin. If you’re ever in Japan, give us a shout!