
Introduction
Just over a year ago, I acquired a bicycle – a Surly Karate Monkey (http://www.14degrees.org/en/?p=1547). Stock standard, the bike is a single-speed. In other words, it has only one gear. This is not conducive to the most efficient cycle touring in the world, so I splashed out and changed to a Shimano Alfine 8-speed internal gear hub (IGH).
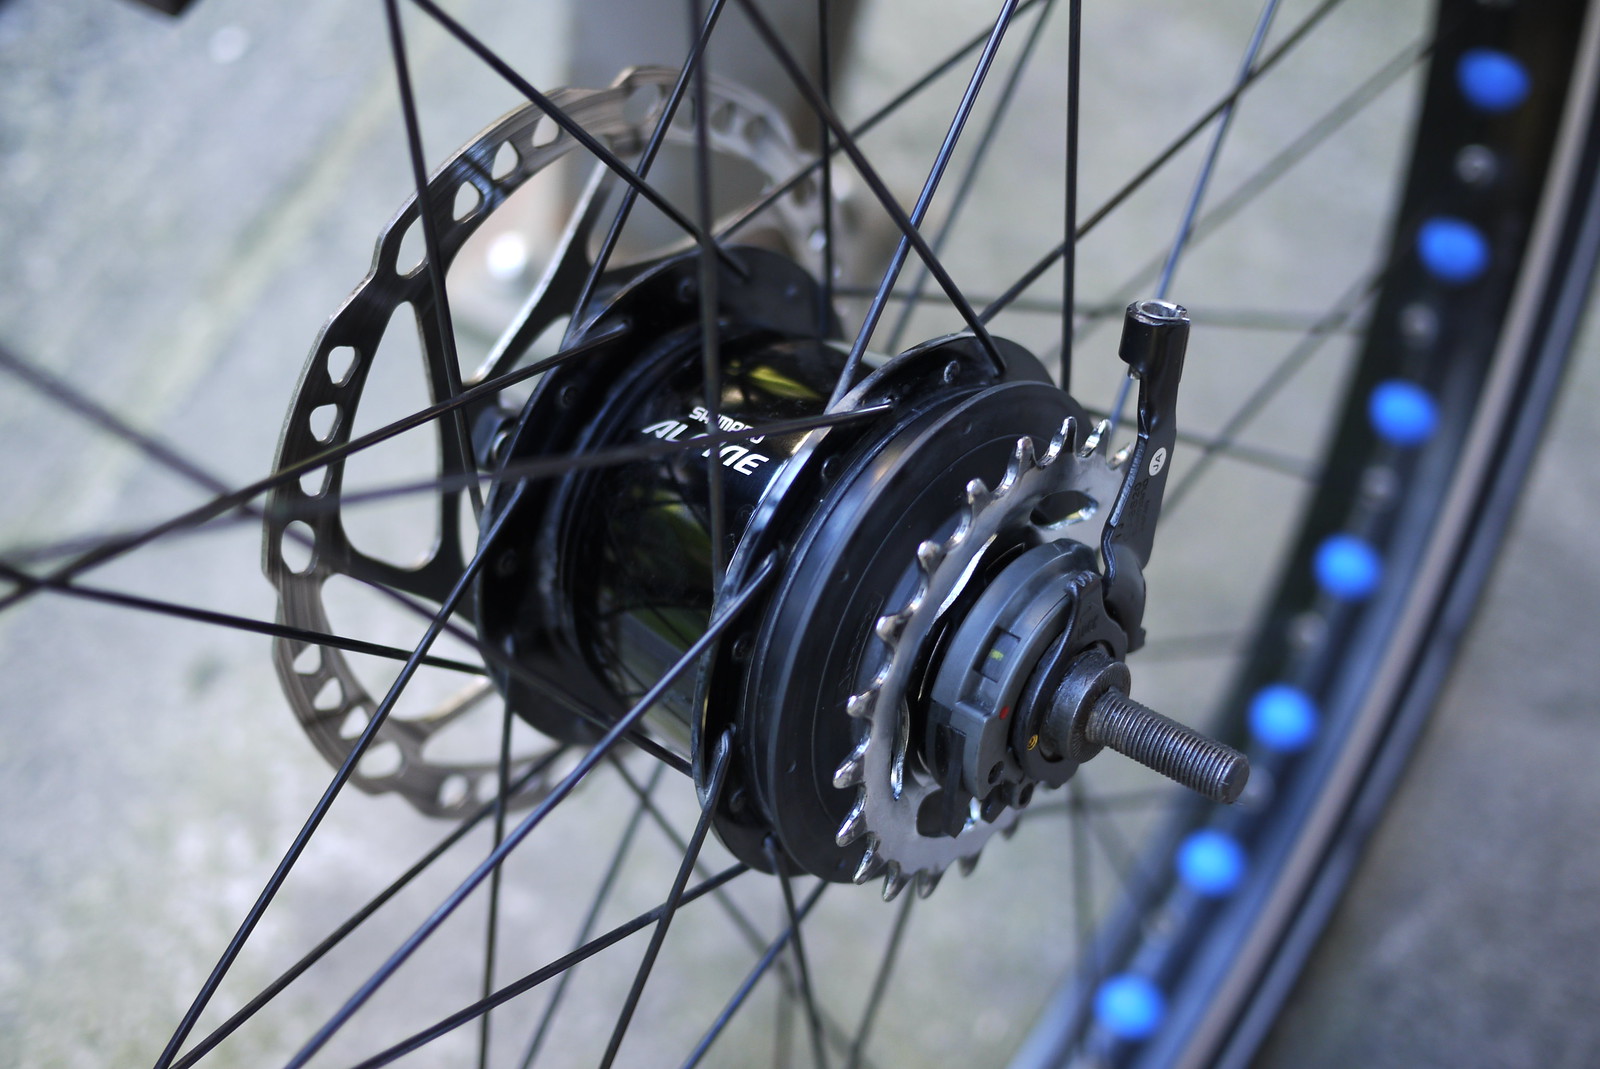
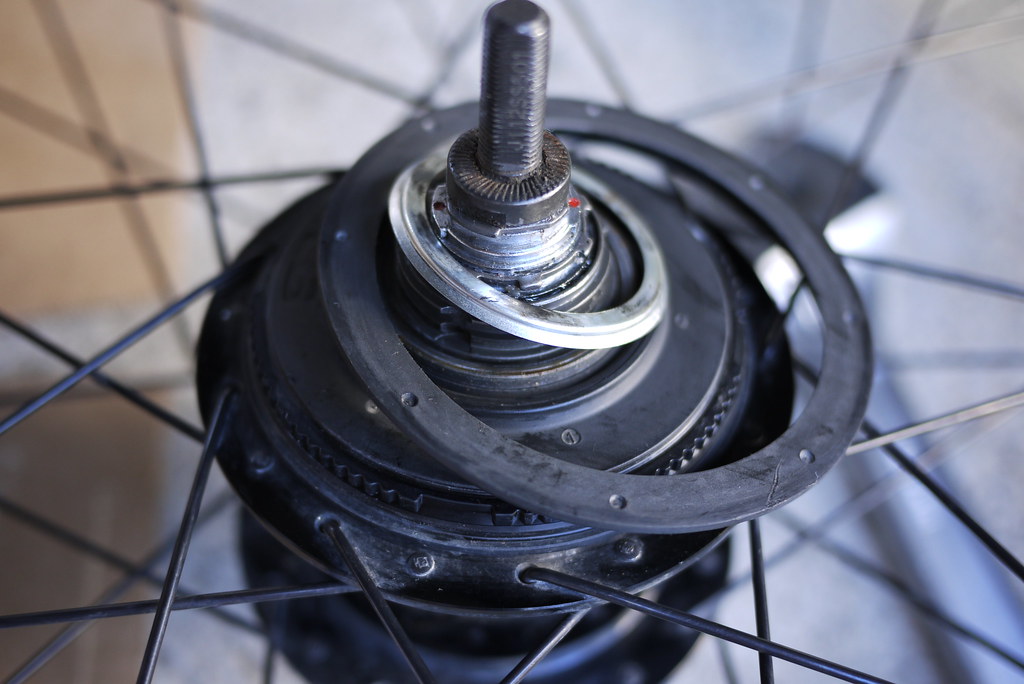
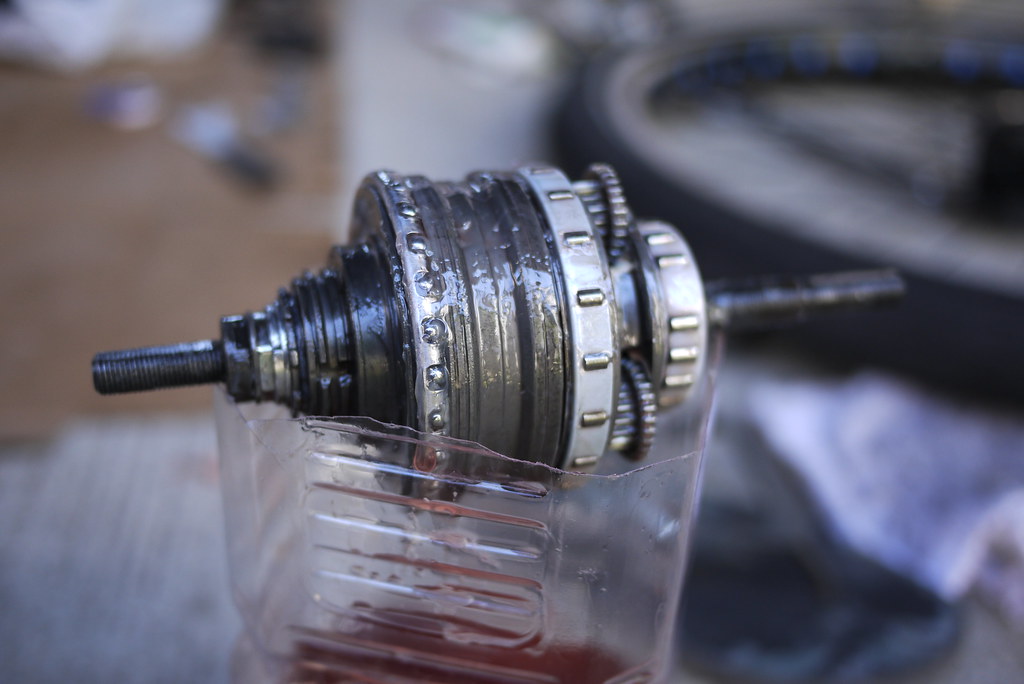
As you can see, there one cog on the outside, and all the gears, in the form of, literally, gears, are on the inside of the hub shell. The beauty of this setup is that a bicycle with an IGH essentially becomes maintenance free (when one compares with a typical derailleur setup, where you have to clean multiple oily cogs quite often).
IGH’s do need maintenance every now and then, though. I’ve heard of some going for three years before being opened up, and the insides looking like new, but after one year, mine was starting to act up a little; a little more friction than usual, and it was sometimes taking a full half-rotation of the pedals in order for the drive to engage after free-wheeling. I live in Sapporo, Japan, and even though this is the land of Shimano, IGH-equipped bikes are extremely rare here, so there was little to no chance of having the hub serviced locally. Therefore, I decided it was time to pull the thing to bits and have a gander.
The most useful resource for learning about how to pull a Shimano Alfine 8-speed hub to bits was this video below.

Other resources included Nick Foster’s very recent post, of course Muddymole’s post, Ian’s page about the Nexus hub and adding an oil port (similar to the Alfine, but with less sealing), Lachlan Hurst’s post, wisdomfrom Ecovelo, bike mechanic Sam Larson, Thad at the Golden Wrench and his experiences, Aaron’s Bicycle Repair’s great resource, Sheldon Brown’s advice on lubrication for IGH’s, and last but not least, Hubstripping.com’s page on the Alfine 8-speed hub.
How to Do an Oil Bath on a Shimano Alfine 8-Speed Hub
Step 1
Armed with the right knowledge, and some new tools (I needed a 15mm cone spanner and a centerlock sprocket sans-pin) I got to work.

Step 2
First off is the Shimano Centerlock disk brake rotor. For this, you need a centerlock/cassette tool without the quick-release pin (so it will go over the solid axle of the Alfine hub). The item number on my Shimano tool was TL-FW30.

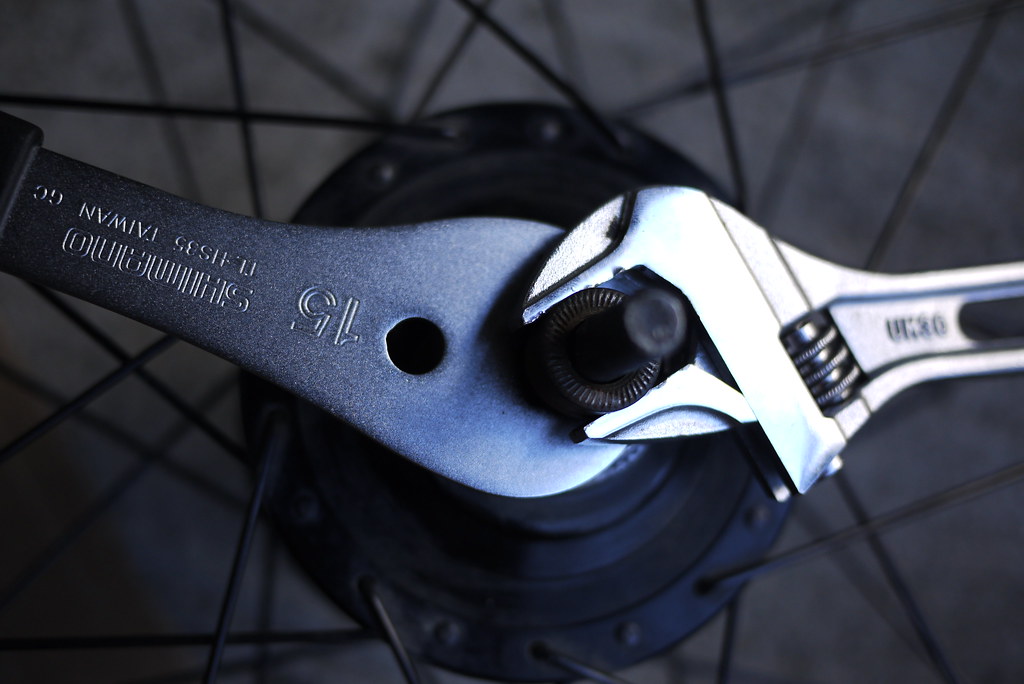
Step 3
Once that was off, I was able to access the locknut and cone. Using a 15mm cone spanner and adjustable spanner, I removed the cone.
Step 4
With these removed, the wheel is flipped over and the drive side bits and bobs removed. This includes the shifting accessories which allow access to a small snap-on plastic cover, which is concealing the snap-ring that holds the cog on. This plastic cover can be pried off by hand very easily.
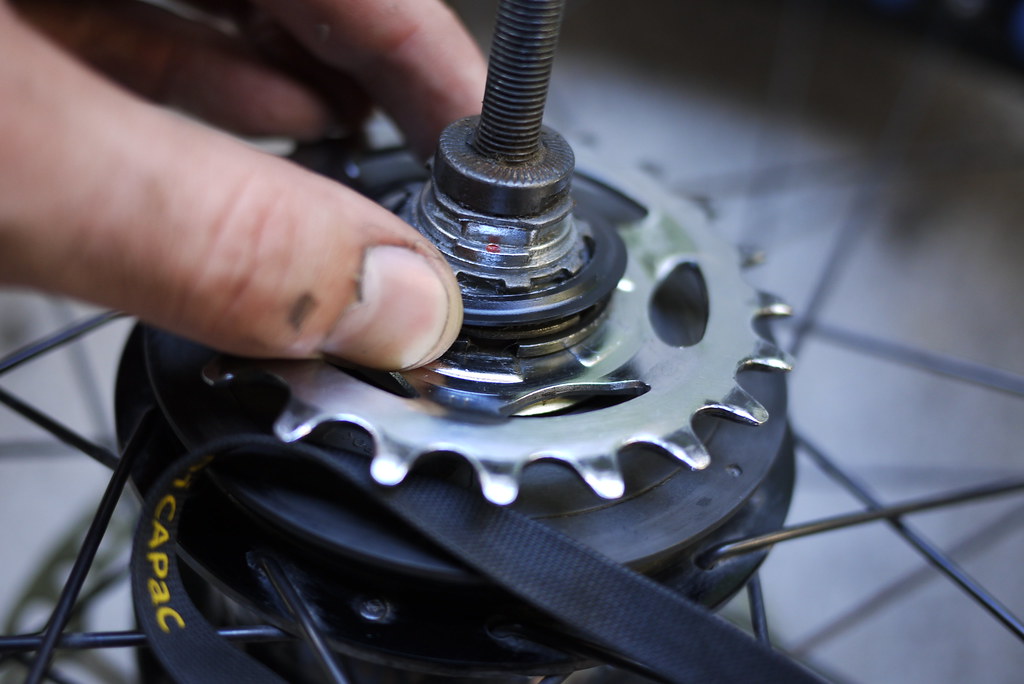
Step 5
Next is the snap-ring. A small flat-head screw driver does this job well. Keep your free hand over the snap-ring – when it finally comes loose, it will spring off forcefully.
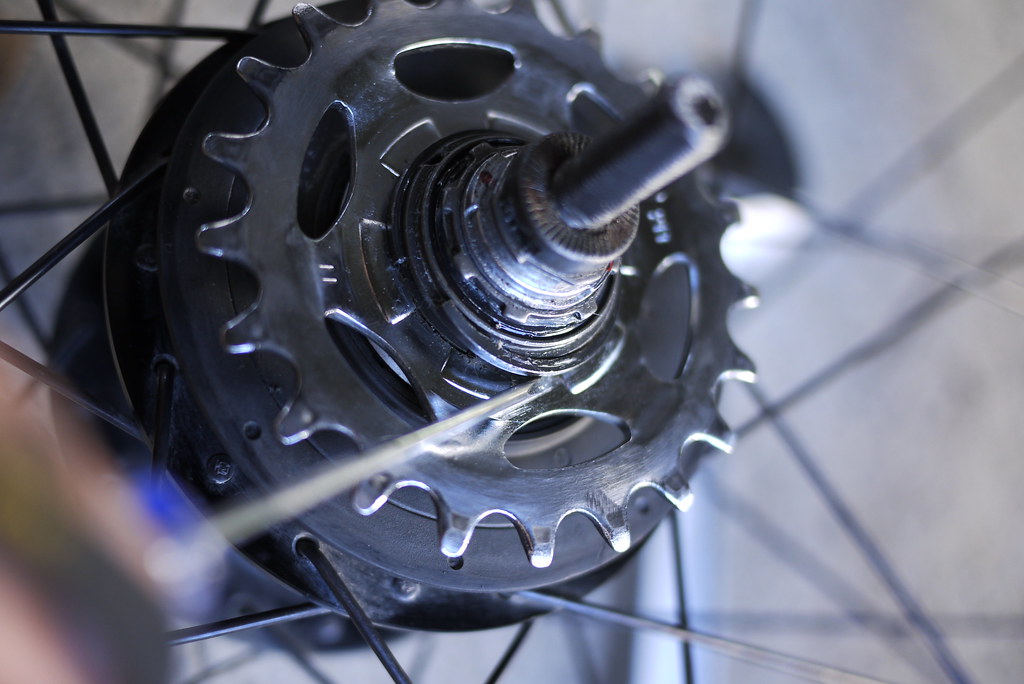
Step 6
Once you have the snap-ring and cog off, a metal dustguard and plastic ring needs to be removed. The plastic ring provides access to the knobby ‘grip’ of the main screw-on dust-cap, which holds the guts of the hub in.
Step 7
Some people have reported being able to screw open the dustcap by hand (it screws open clockwise, which is opposite to normal), but I had to take to it with a screwdriver to loosen it a little. Once the dustcap comes free, the whole hub shell will fall away from the insides.
On my hub, I noticed right away that water had entered the hub at some stage. I do vaguely remember the non-drive side cone being loose at one stage, and suspect that this was the culprit. If the cone is on properly, then the rubber seal should prevent any water from getting in. The rusty residue was not too bad though, and wiped off easily. After cleaning the hub shell, however, there were some visible blemishes on the bearing race, but no noticeable pitting.
To remove the drive-side bearing cage, the hub needs to be split into two pieces. This is achieved by removing the snap-ring at the non-drive side of the unit.
Step 8
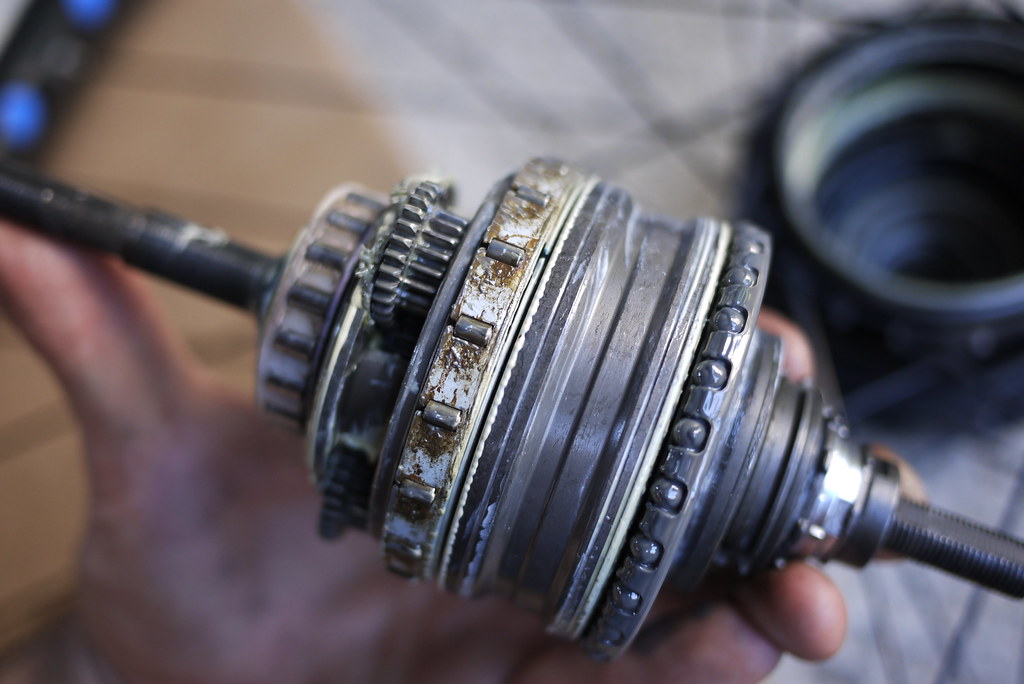
The whole axle unit slides out of the main ring gear unit in two bits (explosion drawing here). There was no visible rust residue inside, so that was reassuring. I cleaned up the drive-side bearing cage, re-greased it, and put the two pieces back together. This is done by lining up the tab on the ring gear unit, and the groove in the axle unit. Even when the tab and groove are lined up, however, the gears need to be rotated around a little to get the ring gear unit to mate to the axle unit (this can take a while to get right).
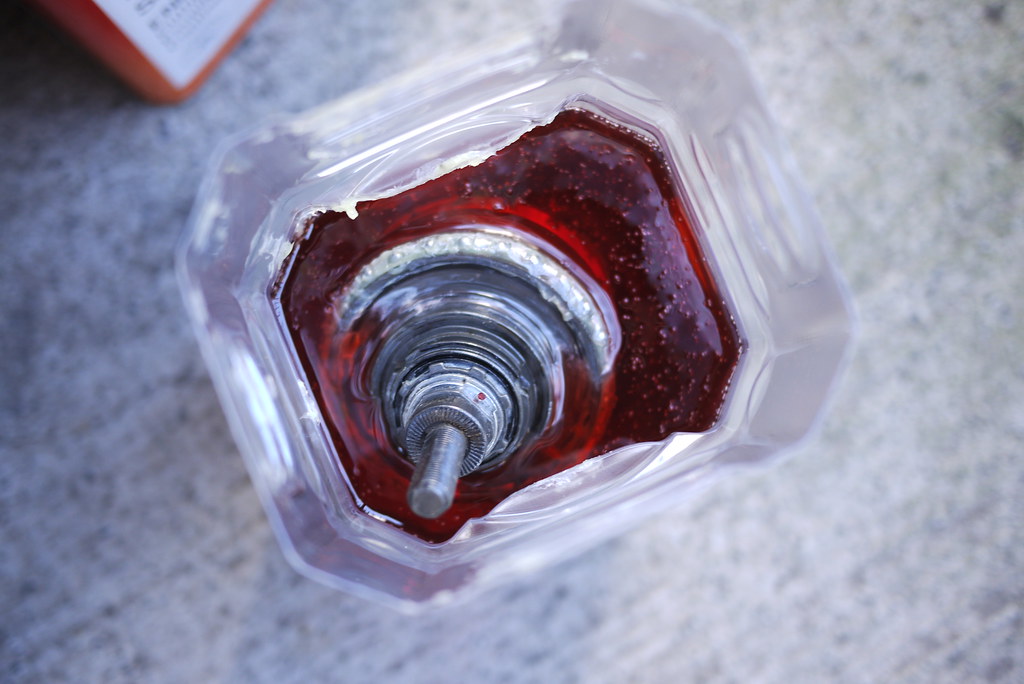
Everything back together, with snap-ring re-installed, the whole lot gets dunked in auto transmission fluid. Mine was just normal, service station (gas station) ATF, using a 2 litre PET bottle as a dunking container.
Step 9
I left it in for about 5 minutes, and then let it drain for about 10 minutes while I was re-greasing the insides of the hub casing.
It is really important at this point to allow the hub to drain well. If too much ATF is left on the hub, it will leak out of the disk-brake (non-drive) side of the hub. If you have a disk brake installed, this will cause ATF to leak onto the disk, ruining your day.
Finishing Up
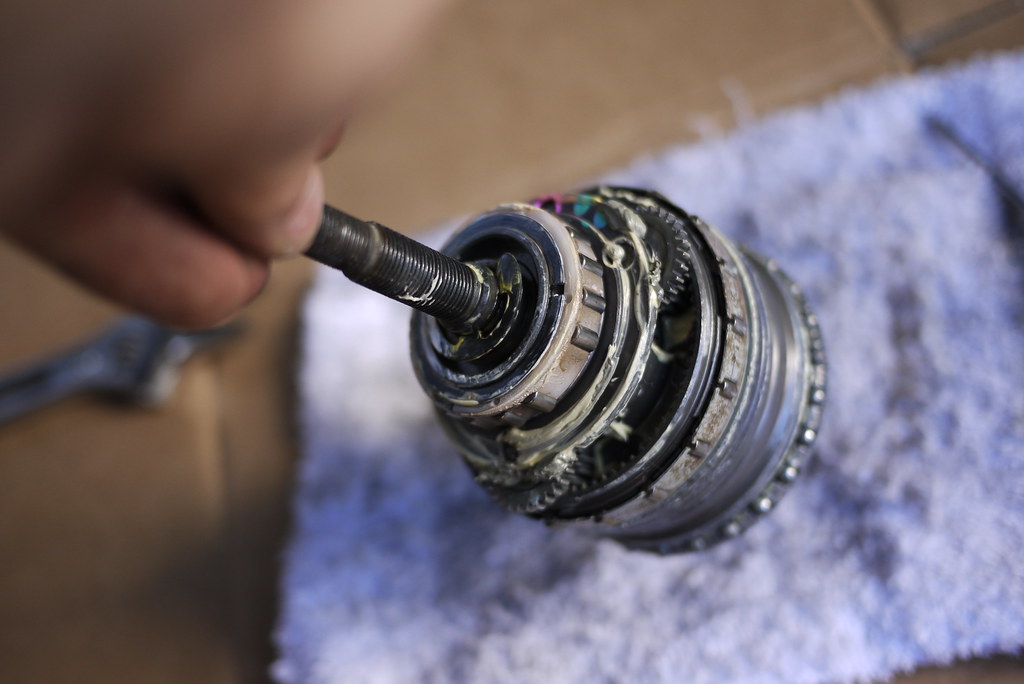
The innards then went back into the hub shell, the various dust covers put back on, the cog and snap-ring (which can be infuriating to get on) and the gear-shifting accessories. And then I took it all to bits again. No joke. I had put the drive-side bearing cage on the wrong way around. The picture above shows it in the correct orientation. That was not a happy moment when I had realised I had put it on wrong…
In all, it took me about 45 minutes plus another 20 minutes to rectify the bearing cage issue. Next time it will take around 30 minutes, I would say. That’ll probably be in another 12-18 months time.
Without the oil bath, the hub just has grease inside it. This means there is quite a lot of friction. For example, when back-pedaling the bike on a workstand, the back wheel will start to rotate backwards. With the oil bath, however, backpedaling does not affect the back wheel. I didn’t notice any difference in gear changing; that is as smooth as ever.


64 thoughts on “How to Convert a Shimano Alfine 8 Speed Internal Gear Hub to Oil Bath”
Hello Rob,
Thanks for your great instructions, Rob. My Alfine had gotten really noisy and “draggy”. There was some rust on the drive side but inside was very clean. Looking forward to rebuilding the wheel and seeing whether it runs more quietly. Have you ever done this with the IGH cassette still in the wheel? I only did it because my rim was damaged and had to rebuild the wheel regardless.
Hi Joe, I’ve only ever done this overhaul with the internal gear hub still attached to the wheel, so I can confirm it’s possible!
Thanks for sharing your experience! I found this very helpful in prepping to open my Alfine 8 spd hub, SG-S7001-8.
After a few years of daily commutes in all kinds of weather, I was expecting rusty disaster after reading about others’ experiences. This hub is one of the newer 8 speeds with pretty decent seals and moderate grease. There was no water entry and everything looked absolutely great.
I wiped it all clean, greased the bearings with some recommended boat trailer bearing grease (super waterproof), opted to inject some Phil Wood Tenacious oil into the mech instead of a full oil bath, wrapped it all back up, and it purrs very softly and nicely.
Thanks for the clear concise write up!
I’m going to tackle Alfine 8 overhaul as described this weekend.
Hub has seen at least 6 years of Bullitt cargo bike use with no service, so it’ll be interesting to see how it looks inside…
Oh wow, that’d be really interesting to see what’s going on inside. I imagine it has seen some pretty heavy duty use!
Concerning Alfine 8 hub lubricant: I just bought Shimano’s recommended, blue tinted, Internal Hub Maintenance Oil ($60 USD for 1 L!). On the can, the composition is listed as: Mineral oil (90-99% ), Additives ( 1-9% ), Dyestuff (blue less than 0%) (their math not mine). This formula seems similar to premium, mineral oil based, power steering fluids which cost $5-$20 per quart.
This is all excellent information, but the title is misleading. The hub is not being converted to run in an oil bath, like Alfine-11 does. To convert it, there should be a drain port installed in the hub shell, and the hub actually operate on the bike with a bath of oil.
Interesting perspective, Joe. I’m not sure exactly what the definition of a ‘bath’ is in this context. I know my Alfine-11 only has between 25-50ml of oil in it, which might be pretty close to how much oil is still left over after doing this Alfine-8 oil conversion? Although you’re right – there’s probably less oil actually in the Alfine-8 hub compared to the Alfine-11.
Why do people use automatic transmission fluid for this conversion, instead of using manual transmission fluid? This seems like a “WD40” solution, where one Average Joe uses whatever he has in his garage to solve a problem, and it seems to work okay so other Average Joes copy him. Automatic transmission fluid is formulated to become extremely sticky when squeezed into a microscopic film, to improve the grabbing power of the clutch components inside an automatic transmission. This seems like it would not be beneficial in a Nexus/Alfine gear hub, because they don’t rely on friction to keep the selected gear engaged. Manual transmission fluid *should* work better, unless there is something I’m not understanding.
Hi Shawn, Average Joe here 🙂 After poking around on the interwebs, I wonder if the reason for using ATF is in the viscosity (i.e., less viscous, less drag)? Mind you, Alfine 8 out of the factory use grease, so yes, I also presume gear oil would work.
Hello.
I recommend using EP-1 grease together with an ATF oil bath, or use EP-00 grease without an oil bath. The EP-00 grease is semi-fluid, so it is ideal for lubricating Nexus 8 / Alfine 8
I don’t know if that is the reason, but Alfine/Nexus hubs do rely on friction to transmit power on the two roller clutches. If is a different process than the automatic transmission clutch, but the power transfer relies on the friction between a smooth rotating surface and the rollers wedged against another rotating surface.
Former auto mechanic here… ATF is a *much* lower viscosity than manual gearbox fluid, and as a result will flow into the gears of the hub much more efficiently. A common trade trick is that mechanics will soak tools such as ratchets and pliers in ATF overnight to keep them running smoothly. Do that with gear oil, and you’ll end up with a sticky mess. For an IGH, this potentially means less drag compared to using MTF.
Another (mixed) benefit of ATF is that it typically has a high level of detergent additives in it, which helps keep the internals clean. The downside is that his may necessitate more frequent cleaning so that the debris that gets collected in the fluid doesn’t accumulate too much in the gears, if one is going to use it for a Shimano hub gear.
For comparison purposes, the average mineral oil (which Shimano IGH maintenance oil is apparently 99%) 21.11 mm²/s (cSt) at 40°C.
Generic Castrol ATF is 30.2.
Generic 75w90 manual transmission fluid is 110.
SG-S700 Oil for the 11 speed hubs is 153.1(!)
So if you’re running an Alfine 8, automatic transmission fluid will work, it might even be a little bit thicker than the stock Shimano fluid, providing a bit more protection but sacrificing some extra drag. On the other hand, it will probably be too thin for the 11 speed. In that case, you’ll want use manual transmission fluid which will be cheaper and provide a bit of a performance boost, which will offset the extra weight your wallet that comes from cheaper fluid 😉
Excellent instructions! Just finished lubricating my Alfine 8 following the instructions. Mine has run about 2000kms over the last 7 months mostly in winter conditions (snow, slush, and salt), and I found quite a bit of rost inside on the drive side. Only hiccup was that I was so glad about reaching Step 8 that I forgot to remove the axle unit from the main ring gear unit before dunking the whole thing into the ATF. I know this kind of defeats the purpose of the whole exercise…will make sure not to forget the last step when I do the next maintenance 🙂
Great to hear, György. Separating the axle unit from the main gear unit is not super important, especially if there doesn’t seem to be any contamination in there.
Excellent instructions, thanks. Took me about an hour tonight to do my first alfine service.
Great!
Hey, I recently did mine, Nexus 8 red stripe. Had had it for maybe 6 years with no servicing. When I took it apart, it looked perfect inside, no rust (they say the Nexus might rust inside in wet climates) still ample original Shimano grease, axle bearings like new, and I’m not a trifle to work under:) – I’m 1.90 tall at 115 kg. I soaked it in transmission oil for a day or 2, then injected it with high quality industrial transmission semi-liquid grease (NLGI 0), put some denser NLGI 2 bearing grease on the ball bearings. After reassembling it is noticeably quieter and runs like a charm. Recommend doing it yourselves, it’s like jigsaw puzzles:))) – better to download the pdf schematics before getting at it – each hub has a code on it, because they vary, so it’s better to then download the manual for exactly the same model. Have fun:)
I’m just wondering, when ypu said that if too much oil is left inside the hub then it will leak out the disc side…. is this an opportunity to see if a “proper” oil seal could be pressed into the housing tube that supports the disc that then seals against a flat version of the cone nut. I mean a culindrical and polished cone nut. Because if thos can be solved we then have a viable well sealed oilbath hub. The other thing I am wondering if a sealed bearing could be pressed in there too because that would solve a lot of issues around bearing play causing the seals to …break seal and leak. You see I always thought the sealing weakness was on the drive side.
How did that hold up, with the transmission fluid lubrication? Did you also paint the internals with the white shimano IGH grease? I would worry about bearing grease degrading from the detergents in transmission fluid.
TIA
Hey Tom, after a few frustrating cases of ATF leaking out of the hub onto the disk brakes, I really make sure to drain the hub well before putting it back into the hub shell. Doing so has fixed the leaking issue. As for grease, I used some pretty standard Shimano bearing grease. It seems to be holding up OK.